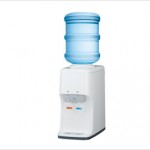
- Place a cooler on flat floor and keep the distance more than 15cm from wall backside.
- Put a water bottle into the cooler and open hot water faucet until the water comes out.
- After checking the water coming, connect the cooler to electricity and turn on hot water switch in the top of back panel.
- If all lamps in the front of cooler turn on, the cooler is ready to use.
* Don’t connect the electricity and turn on hot water switch before putting the water in.
* Empty hot water tank can be easily overheated so it should be very cautiously considered and handled.
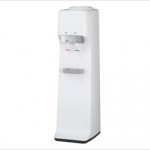
How to install Cooler properly
No cold water
- Check the water in the water bottle.
- Check the cold water lamp in the front panel of cooler.
- It takes about 50minutes to get cold water after initial installing.
- If lots of water is drawn in a short time, then it is also required to wait for additional time to get cold water.
No hot water
- Check the water in the water bottle.
- In case that the cooler doesn’t have enough water inside, the heating of hot water tank will be stopped to prevent overheating and an accidental fire.
- Check the hot water lamp in the front panel of cooler. In case that the hot water lamp was turned off, check the hot water switch in the back panel.
- It takes about 30minutes to get hot water after initial installing. And if lots of water is drawn in a short time, then it is also required to wait for additional time to get hot water.
Noise of Product
- Check the place where the cooler is installed. Because the surface of place should be flat and hard to make the cooler operate smoothly.
- In case of normal operation of compressor, the slight sound of motor is occurred.
- The compressor operates 4~8 times per an hour and it may cause a clattering sound.
- When the water is frozen in cold water tank, it may cause a slight ice breaking sound.
- When the wire condenser and other parts can cause friction by touching each other.Rearrangement of parts inside should be required.
Replacement of Faucet
- Prepare new faucets and if you don’t have new ones, contact service center.
※ Caution – Disconnect main electricity before replacing the faucets.
How to clean the cooler inside
- Disconnect main electricity and clean your hands and remove a water bottle.
- Hold water guard where water bottle is placed on with two hands and turn it 5cm to left direction and pull it out.
- You should hold water guard very tightly with two hands because cooler inside is vacuum condition.
- Turn and pull out the plastic transparent separation lid from the cold water tank.
- Remove drain cap in the backside of cooler that is connected from hot water tank.
- Put some clean water into cold water tank and wipe it inside with a clean dish towel.
* Caution – Don’t apply any detergent. - Rinse it out with clean water 2~3times and dry it out.
- Open the faucets to remove the water left of cooler inside.
- Assemble the cooler again and wait for 2~3hours until water is dried perfectly inside and outside of cooler.
- Follow the direction again as How to install Cooler properly in initial stage.
* Caution – Don’t boil plastic parts during cleaning the cooler because it may cause deformation of parts.
How to keep the cooler during winter time or long absence such as vacation.
- If you are not going to use cooler for a long time, remove water perfectly in cooler.
- Draw the water inside cooler through faucets and drain cap and dry the cooler to keep.
- If you keep the cooler carrying water inside in very low temperature environment, it may cause that the cooler is frozen to burst.
In case of using underground water
- Cooler is not allow to use underground water due to unexpected sanitation issue and rust issue.
- You should use well treated mineral water.
How to replace filters
- Cooler doesn’t have filters which need to be replaced because it use already treated water.
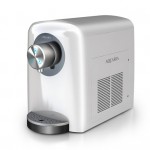
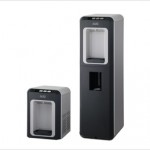
How to install POU properly
- POU should be installed by qualified service personnel because abnormal installation by unqualified person may cause serious water leak.
- Place POU on a firm and flat surface. Unbalanced installation may cause noise or vibration.
- Put POU in open area and at least 4 inches(or 15cm) away from the wall. Otherwise cooling efficiency may be decreased.
- POU should be located within 6 feet(or 2m) from the nearest electrical outlet.
- Tubing job(usually 1/4”) which connects POU to water supply should not be exceed in 65feet (or 20meters).
No cold water
- Check the water supply.
- Check the cold water lamp in the front panel of POU.
- Adjust the temperature of cold water with controller in the top of back panel right side.
☞ Refer to Temperature control of cold water. - It takes about 50minutes to get cold water after initial installing. And if lots of water is drawn in a short time, then it is also required to wait for additional time to get cold water.
Temperature control of Cold water
- Check the controller in the top of back panel right side.
- Prepare ㅡshaped screw driver.
- If the controller is turned with clockwise direction, the temperature goes down.
- If the controller is turned with counterclockwise direction, the temperature goes up.
※ Caution – If the controller is turned too much, it may cause frozen water.
No hot water
- Check the water supply. In case that the POU water supply is interrupted, the heating of hot water tank will be stopped to prevent overheating and an accidental fire.
- Check the hot water lamp in the front panel of POU. In case that the hot water lamp was turned off, check the hot water switch in the back panel.
- It takes about 30minutes to get hot water after initial installing. And if lots of water is drawn in a short time, then it is also required to wait for additional time to get hot water.
Water leakage
Check the damage of POU outside in advance.
In case that the water is leaking from the backside of POU.
Drain cap in the backside of POU that is connected from hot water tank is broken or loosen. So, tighten the drain cap or replace the broken drain cap.
In case that the water is leaking from the hot and cold faucet.
- If the faucets are loosen, tighten it up.
- Check silicon packing faucet inside.
- If the faucets are worn out, replace it with new ones.
In case that the water is leaking from the inside of POU.
If the temperature difference between POU inside and outside is too big, it may cause dewdrops and ice formation.
Noise of Product
- Check the place where POU is installed. Because the surface of place should be flat and hard to make POU operate smoothly.
- In case of normal operation of compressor, the slight sound of motor is occurred.
- The compressor operates 4~8 times per an hour and it may cause a clattering sound.
- When the water is frozen in cold water tank, it may cause a slight ice breaking sound.
- When the wire condenser and other parts can cause friction by touching each other.
Rearrangement of parts inside should be required.
Replacement of Faucet
Prepare new faucets and if you don’t have new ones, contact service center.
※ Caution – Disconnect main electricity before replacing the faucets.
How to clean POU
- Disconnect main electricity and clean your hands.
- Use clean cloth and mild detergent for cleaning and dry the surface with clean and soft cloth
- Clean water tank with vinegar.
- Clean POU every two month unless it includes in-tank sanitization system.
- Do not use abrasive cleaning tools not sharp tools which may cause defects or damage on POU.
- The water faucet becomes dirty easily by constant use. Clean it thoroughly at least once in 3 months.
※ Caution – * Don’t boil plastic parts during cleaning the cooler because it may cause deformation of parts.
* Don’t clean any part of POU with gasoline, Kerosene, thinner and etc.
How to keep POU during winter time or long absence such as vacation.
- If you are not going to use POU for a long time, remove water perfectly in POU.
- Draw the water inside POU through faucets and drain cap and dry POU to keep.
- If you keep POU carrying water inside in very low temperature environment, it may cause that POU is frozen to burst.
Time to replace filters and how to replace filters.
- Normally maintenance company will contact you before filter replacement time is completed.
- If there is no contact from the maintenance company for more than 4months, please call service center.
- Every filter has its own replacement period.
- Youngone corporation adopt 5 stage 3 filters system.
And the filters have been widely approved by many dominant POU companies.
1) Sediment-carbon block filter(Replacement period 4months)
– The first stage(Sediment) : Removal of rust, dust and alien material
– The second stage(Carbon block) : Removal of residual chlorine and other chemical substances.
2) UF membrane filter(Replacement period 20months)
– The third stage(UF membrane) : Removal of bacteria, germs and other harmful microbes
3) Post filter(Replacement period 8months)
– The fourth stage(Post carbon) : Removal of gas substance in the water to improve taste.
– The fifth stage(Ceramic ball) : Restraint of bad odor and control of mineral substance. - The period of filter replacement can be varied based on water quality, the quantity of water consumption and etc.
* The replacement period above mentioned is a recommend period under ordinary using condition.
How to replace CO2 cylinder.
- When CO2 gas is exhausted, Sparkling button on control panel will blink every 1 second.
- Prepare new CO2 cylinder to be replaced.
* You can buy it from customer service center. - Open CO2 cylinder cover next to filter cover and raise an exhausted CO2 cylinder.
- Turn CO2 cylinder 1~2times counterclockwise direction and wait for 15~20 until residual gas is disappeared.
- Turn and pull exhausted CO2 cylinder out.
- Put and turn a new CO2 cylinder in.
* An exhausted CO2 cylinder has a hole on top but a new CO2 cylinder has no hole on top. - Close CO2 cylinder cover.
- Touch sparking button and check if the sparkling water is dispensing smoothly.
- You may refer to video on Youngone website, customer support menu for quick understanding.
* Do not try to reuse exhausted CO2 cylinder.
* Before CO2 cylinder is completely exhausted, do not try to replace CO2 cylinder.
* After replacing CO2 cylinder, if sparkling button keeps blinking, please call service center immediately.